
Introducing Jupyter Scheduler
The Open Source Jupyter team at AWS is proud to announce the release of Jupyter Scheduler, a JupyterLab extension that can run your Jupyter notebooks in the background. Jupyter Scheduler was developed from the start as an open-source project under the umbrella of the Jupyter project and governance. You can set up your notebooks to run once or on a schedule. By default, Jupyter Scheduler runs notebooks on your local system where Jupyter Server is installed; you can also extend the scheduler to run your notebooks in the cloud, on an on-premise cluster, on JupyterHub, or even on supercomputers.
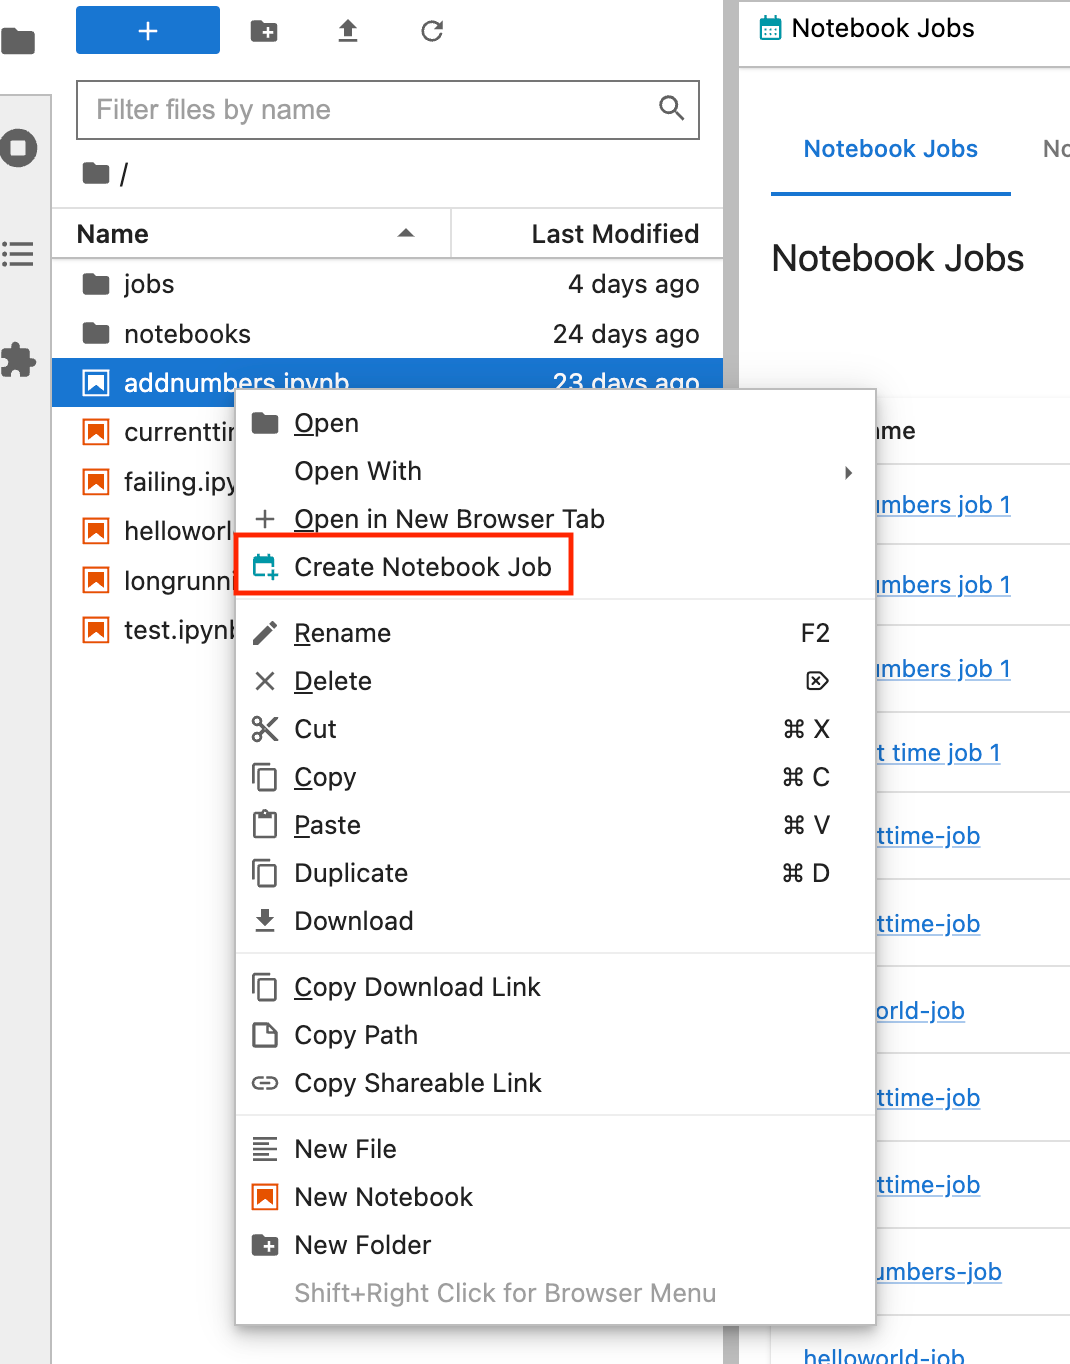
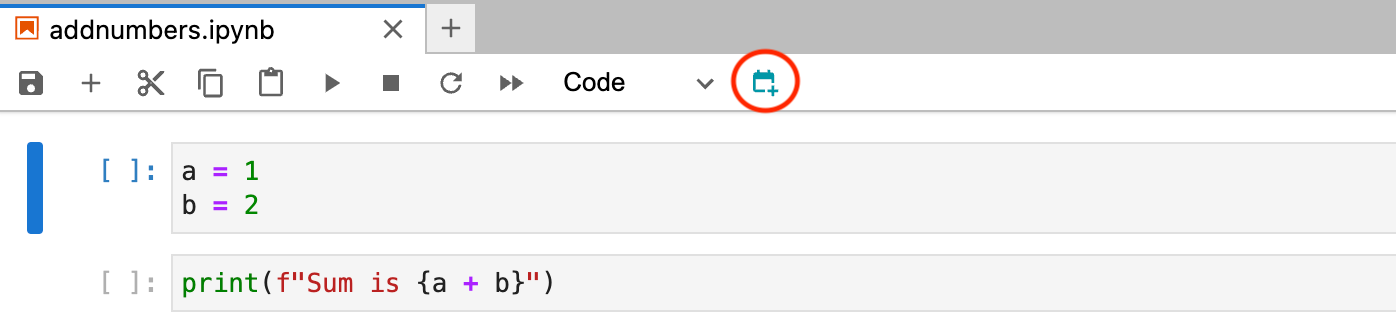
We hope you’ll find Jupyter Scheduler useful for running notebooks periodically, such as daily or weekly reports. You can install it in JupyterLab by running pip install jupyter_scheduler, then restarting JupyterLab. You can create jobs (single runs of an individual notebook) and job definitions (scheduled recurring notebook jobs) in two ways. You can right-click on a notebook in the file browser and choose “Create Notebook Job” from the context menu, or you can use the new toolbar button in an open notebook file.
You can give your notebook job or job definition a name, choose an environment to run it in, select different output formats, and provide parameters that are set as local variables when your notebook gets executed. This parameterized execution is similar to Papermill; Jupyter Scheduler provides a UI for managing and accessing the outputs of your notebook jobs inside JupyterLab.
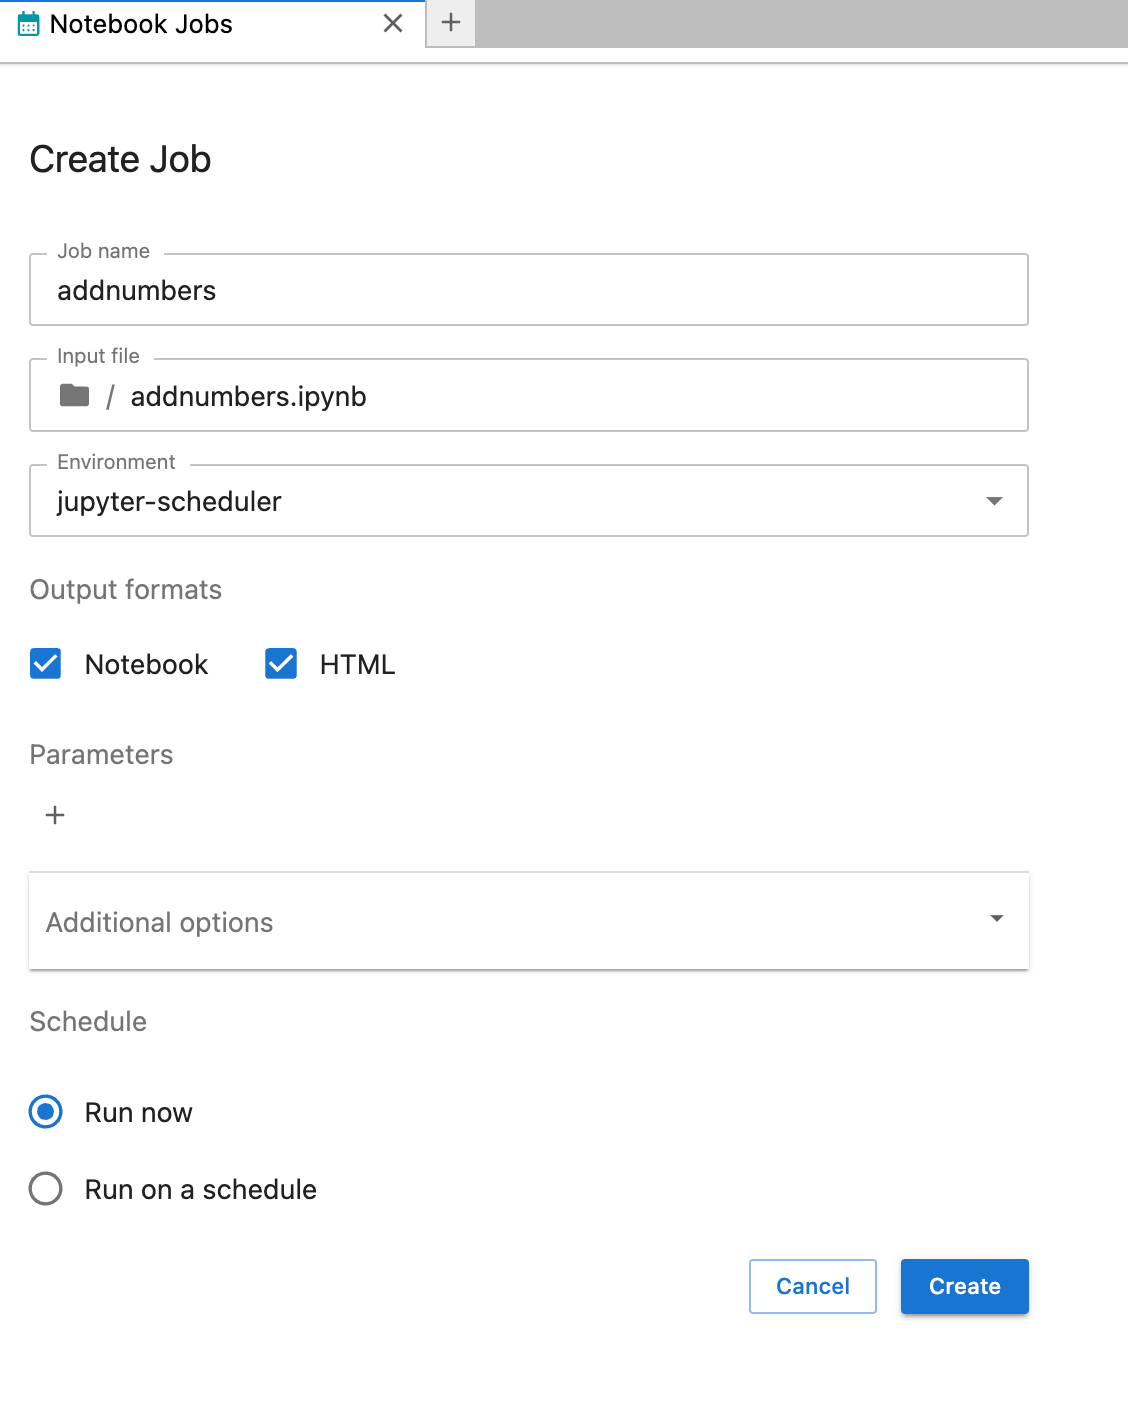
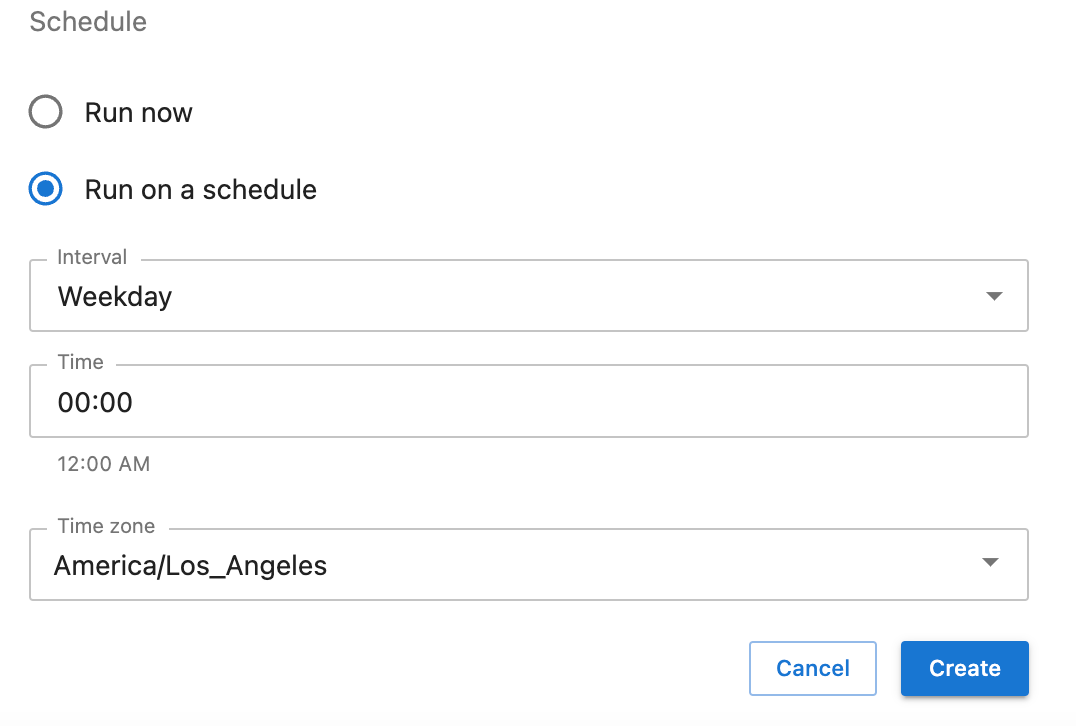
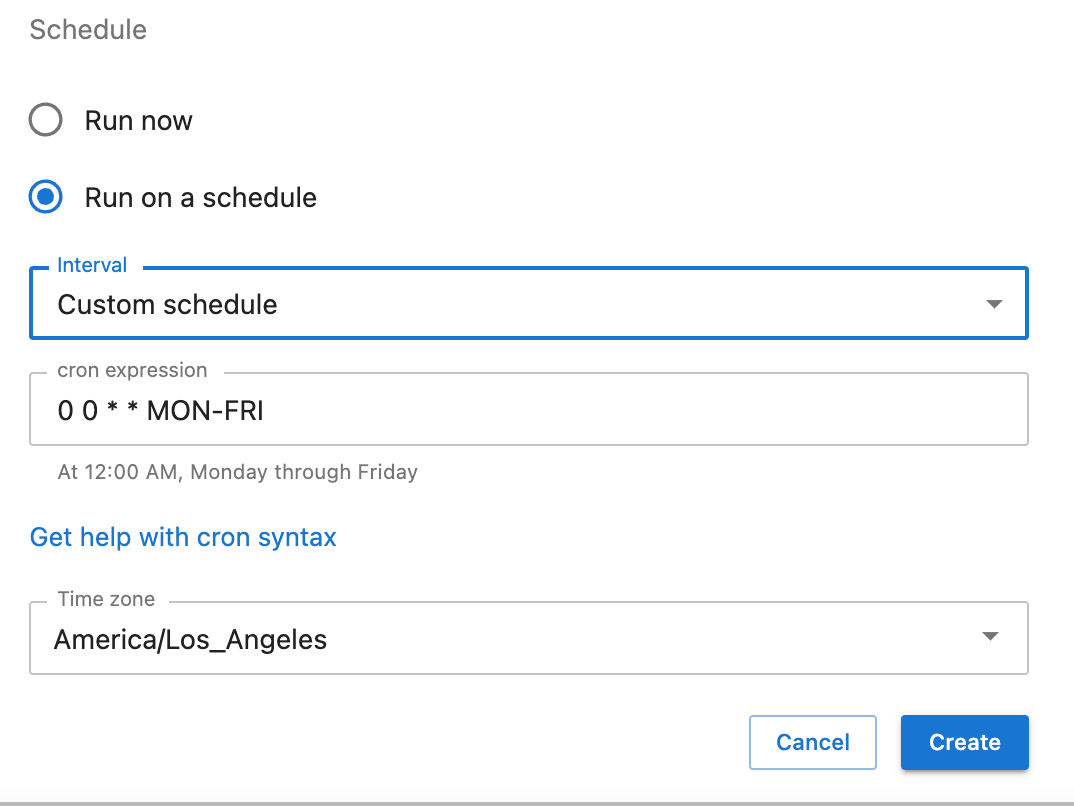
In addition, if you select “Run on a schedule,” you can run your job on a recurring schedule. The scheduler provides a few useful shortcuts to, for example, run your notebook at a specified interval by the minute, hour, day or week. You can also specify a custom schedule in crontab format.
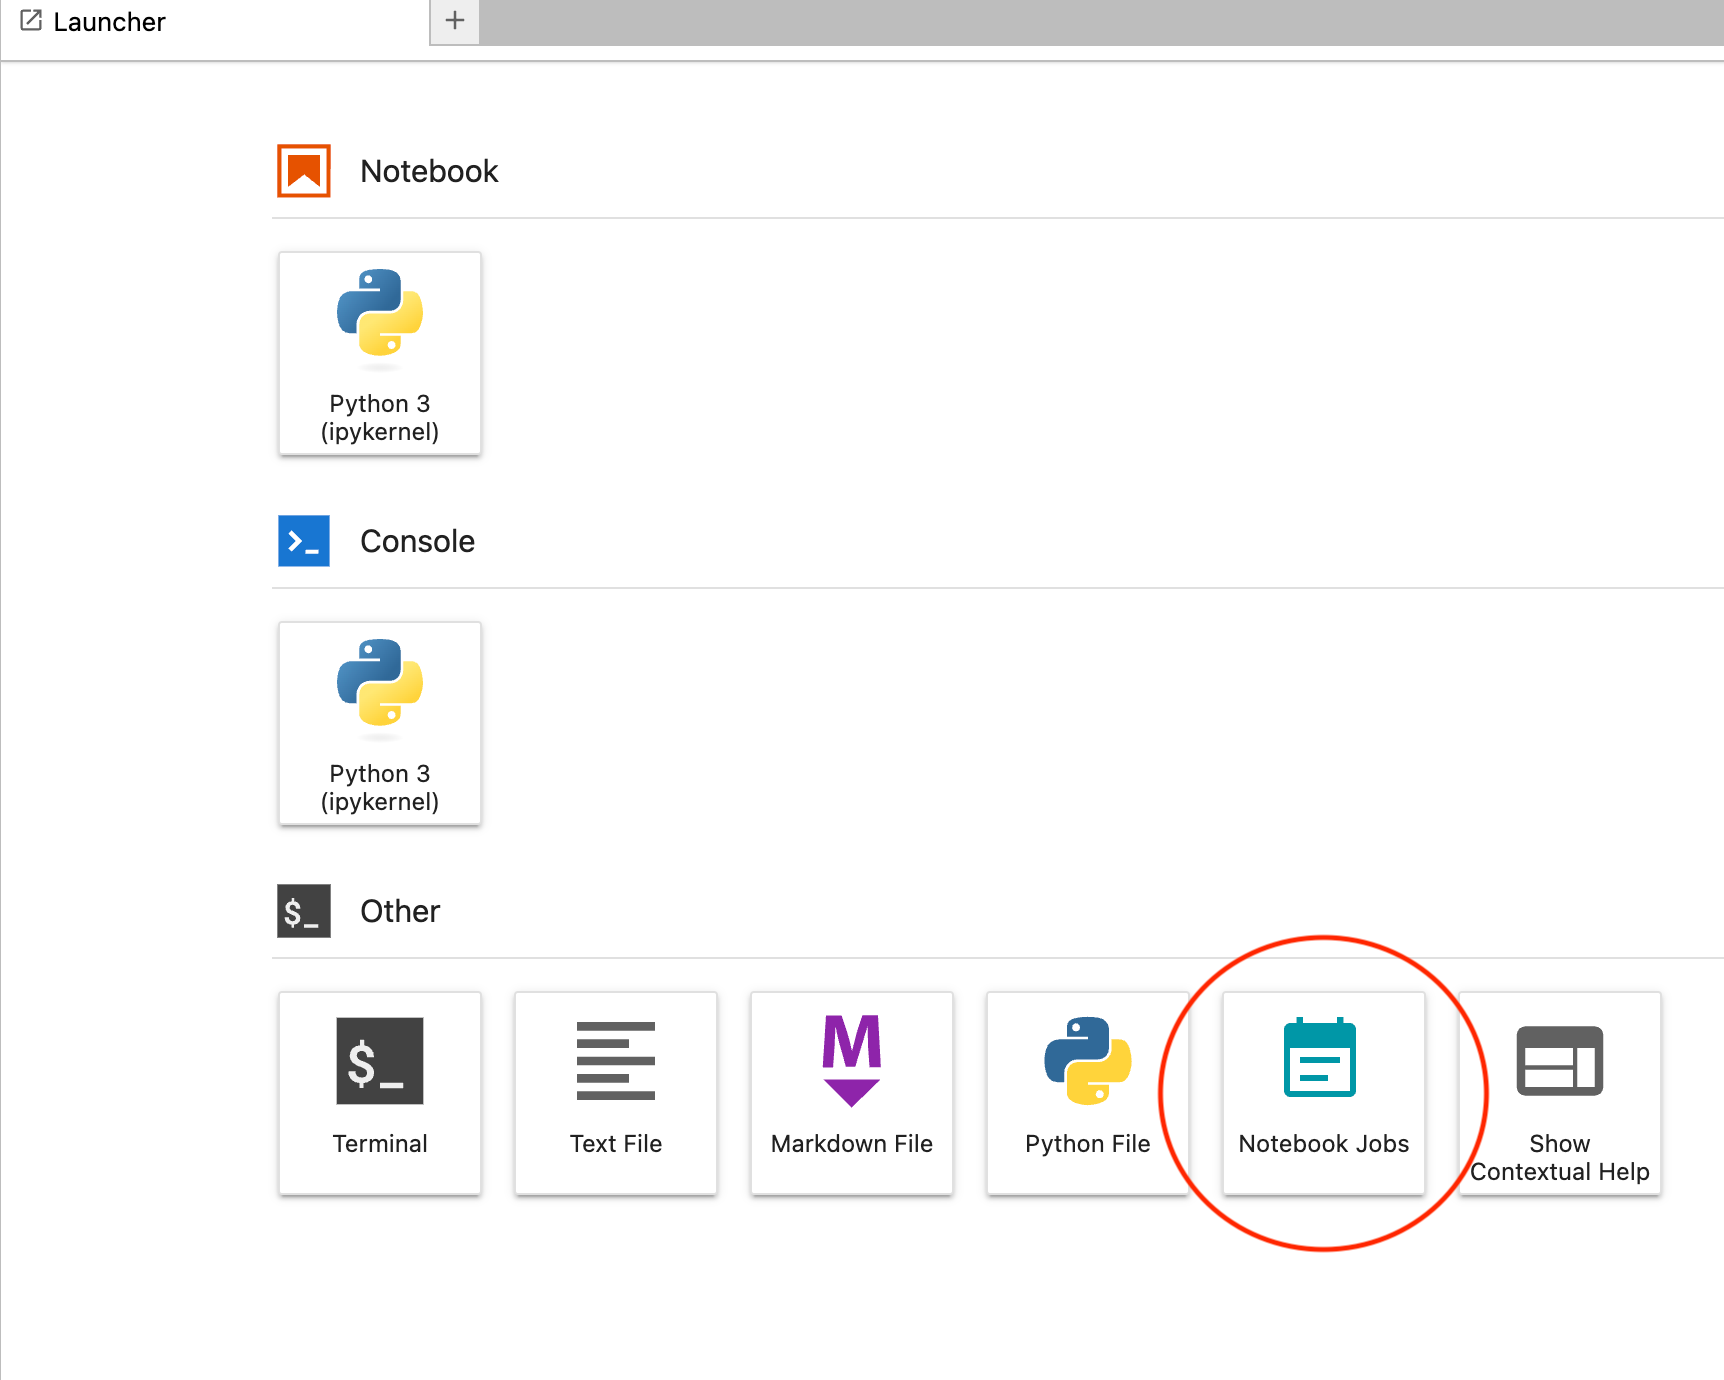
Once you’ve created a job or job schedule, you can use the “Notebook Jobs” icon on the launcher to view lists of jobs and job definitions. Each item’s name links to a detail view.
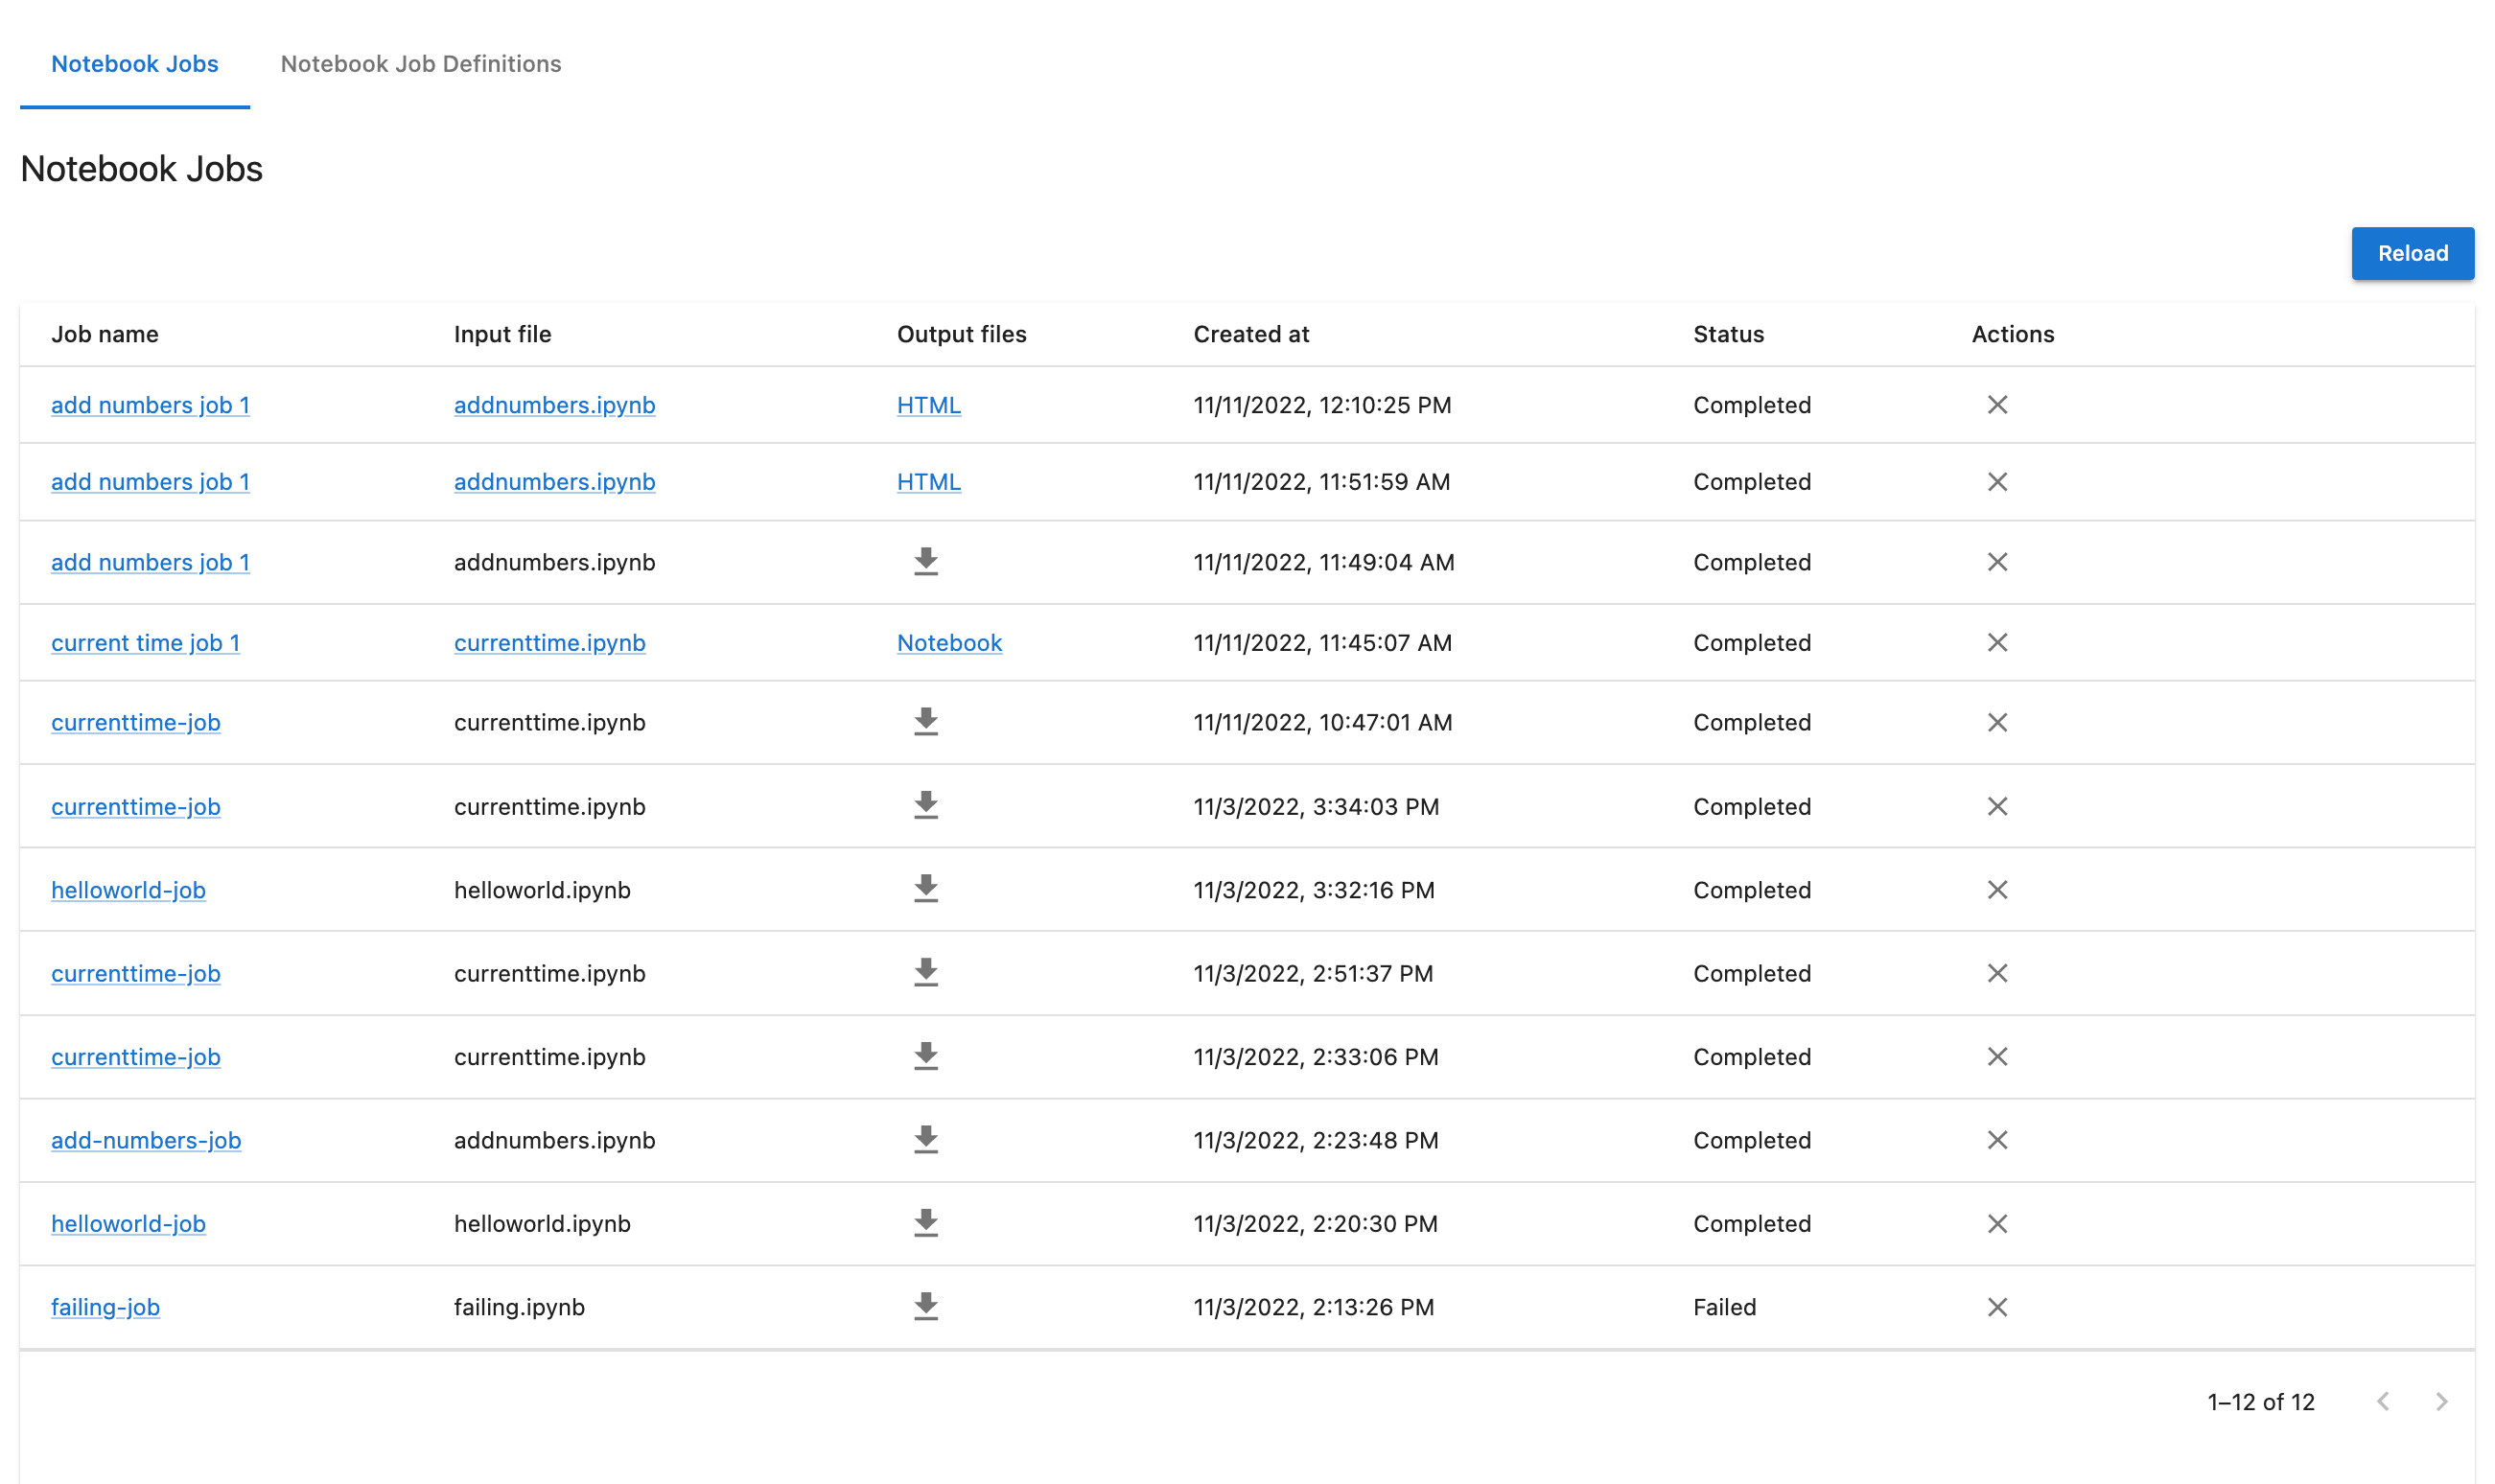
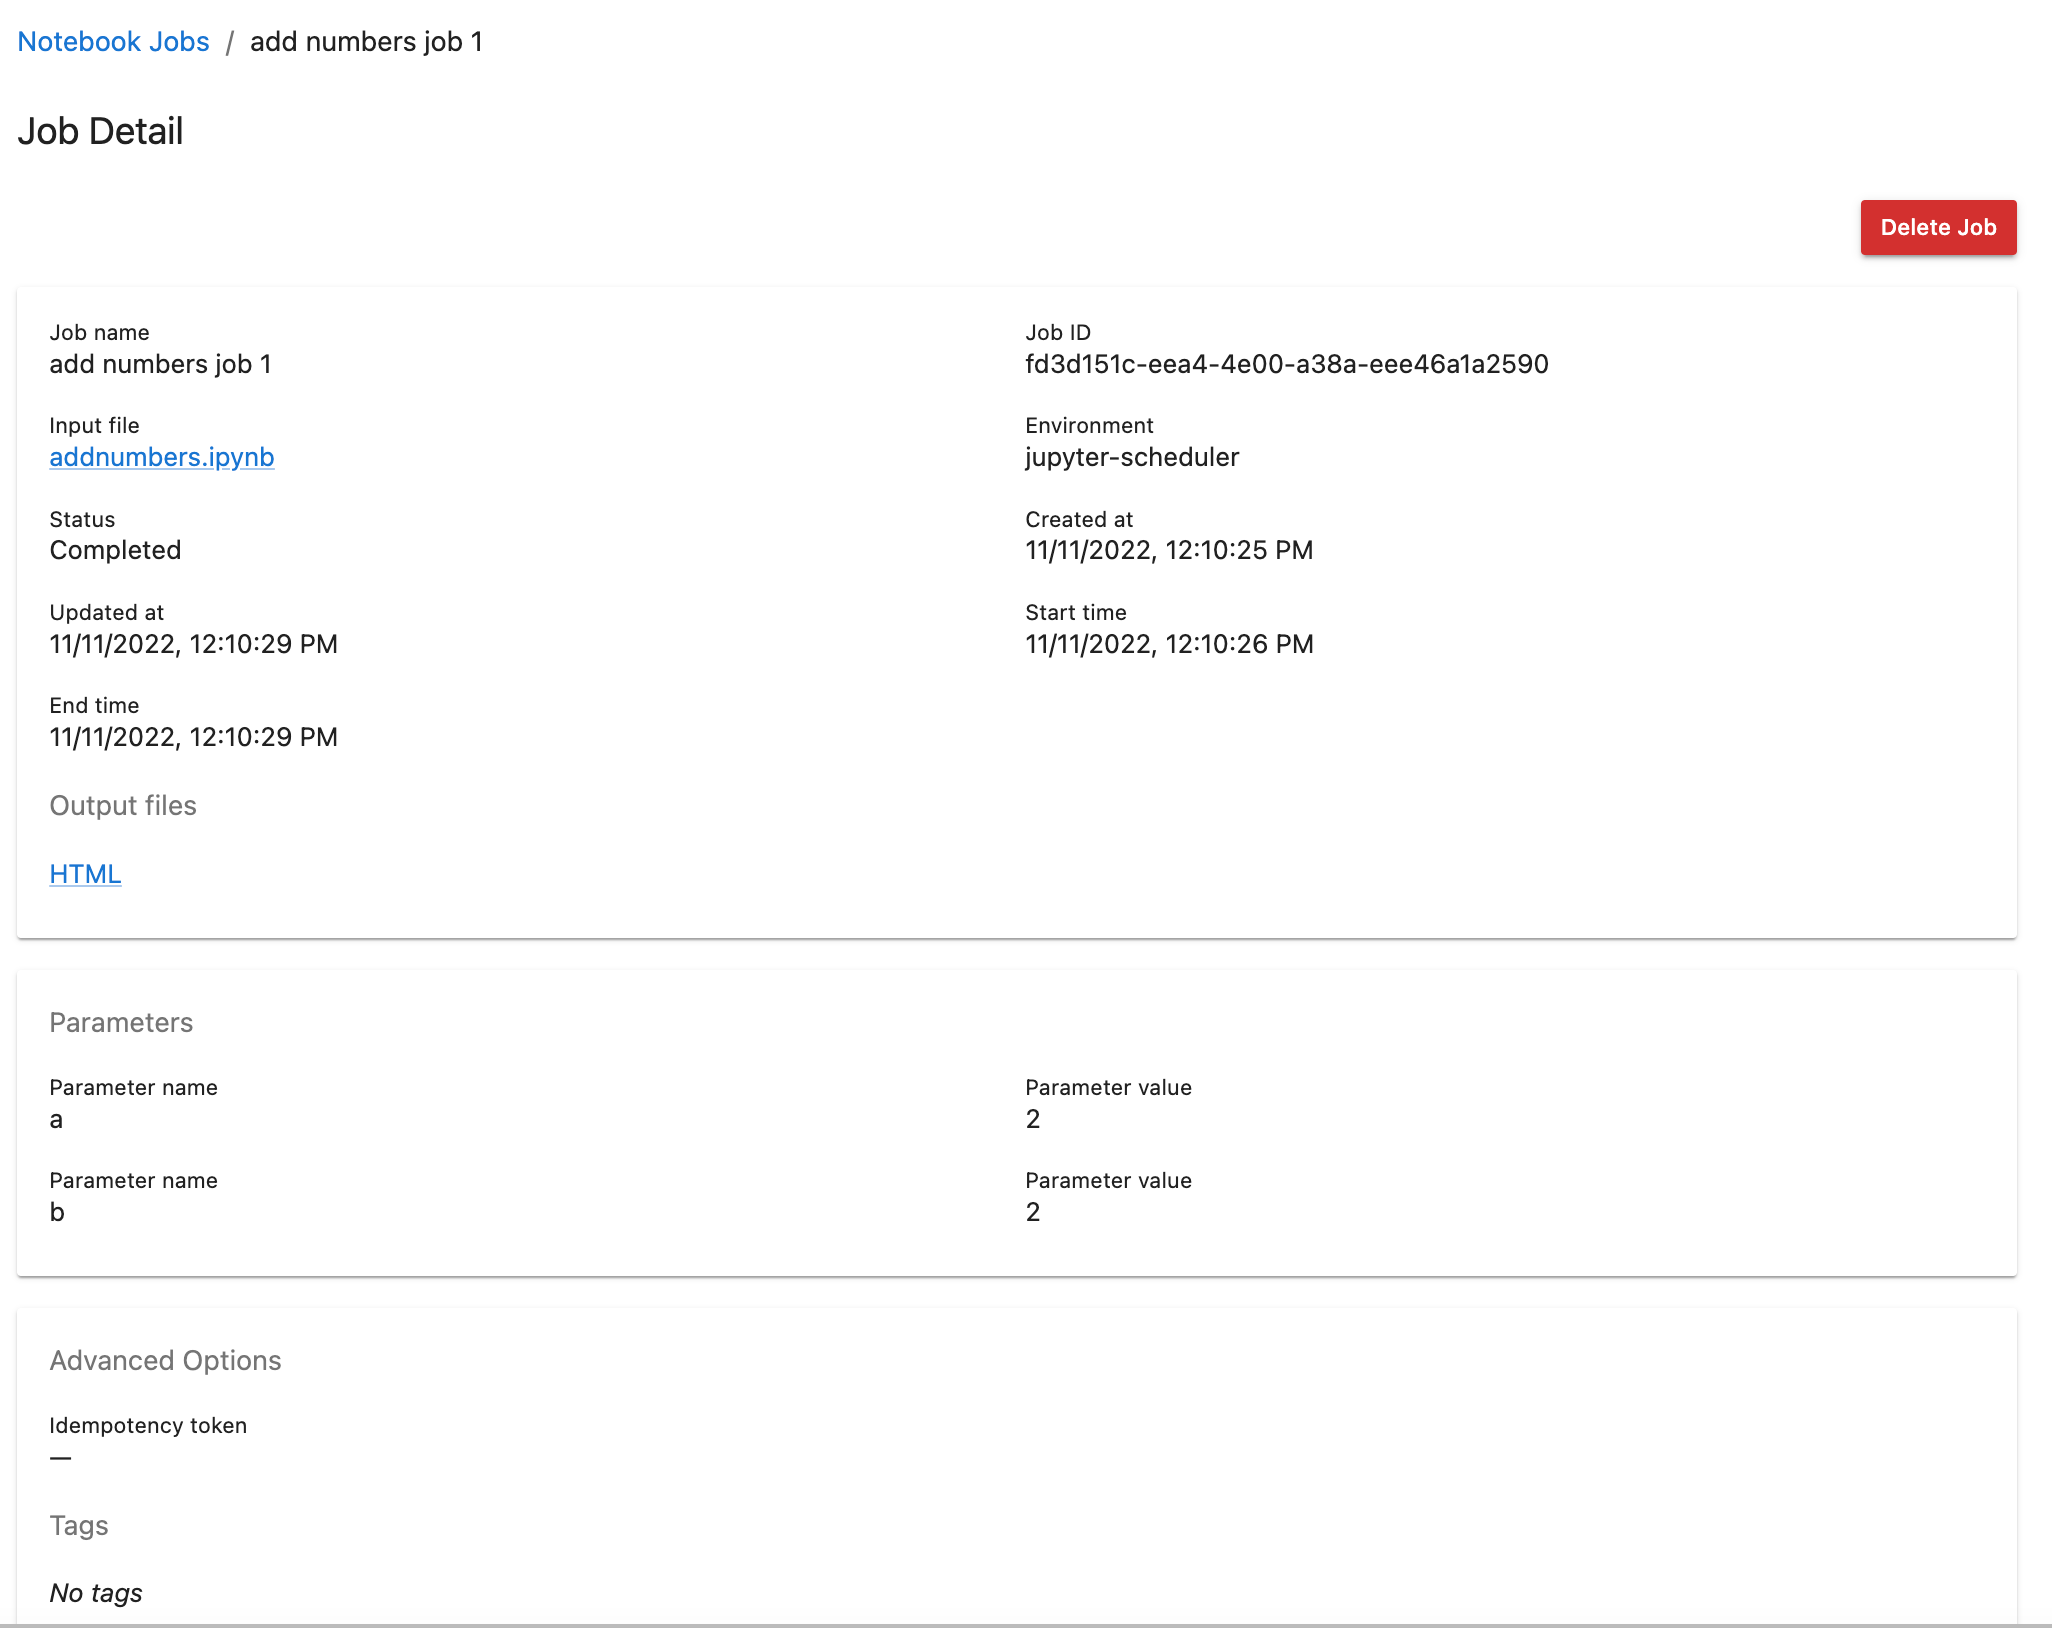
When one of your jobs has completed, you can download its files from the list or detail view. When your notebook runs, the scheduler saves a copy of the input file, so that even if you later change the file, it captures the state of the notebook at the time your job ran. Jupyter Scheduler uses unique names for the input and output files so that rerunning the same notebook produces new files every time.
Jupyter Scheduler uses a REST API to create, update, delete and manage jobs and job definitions. You can also customize Jupyter Scheduler by plugging in your own scheduler class, for example, to replace the existing SQLite database or to run jobs in the cloud. AWS SageMaker Studio actually uses Jupyter Scheduler, with custom classes, as part of its automated notebooks feature, announced earlier this year. See the Jupyter Scheduler operator documentation for more information about how to write and use your own scheduler.
We’d love to hear what you think about Jupyter Scheduler! You can check out Jupyter Scheduler’s documentation on ReadTheDocs. Please open issues with ideas for enhancements and about any bugs you find. If you’d like to contribute code, see the Jupyter Scheduler contributors guide.
This article does not represent the official position of amazon.com or any of its subsidiaries.
About the authors

Andrii Ieroshenko is a Software Development Engineer at AWS. Previously, Andrii worked on the Notifications project as a part of the Jupyter Cal Poly student internship program.

Piyush Jain is a Software Development Engineer at AWS working on open source contributions to Project Jupyter. He is also a member of the Jupyter Server team, actively participating in maintenance and development of Jupyter server project.

David Qiu is a Software Development Engineer at AWS working on Project Jupyter. Previously, David was researching physical chemistry at the University of Illinois at Urbana-Champaign.

Jason Weill is a Senior Front-End Engineer at Amazon Web Services; a contributor to JupyterLab, Jupyter Governance, and Jupyter Scheduler; and a member of the JupyterLab Council, the Jupyter Security Working Group, and the Jupyter Diversity, Equity, and Inclusion Standing Committee.